

|
Proposal Submission For ITS
Click on the option Proposal Submission to see the submenu, as shown in Figure 3.1. The options available are:
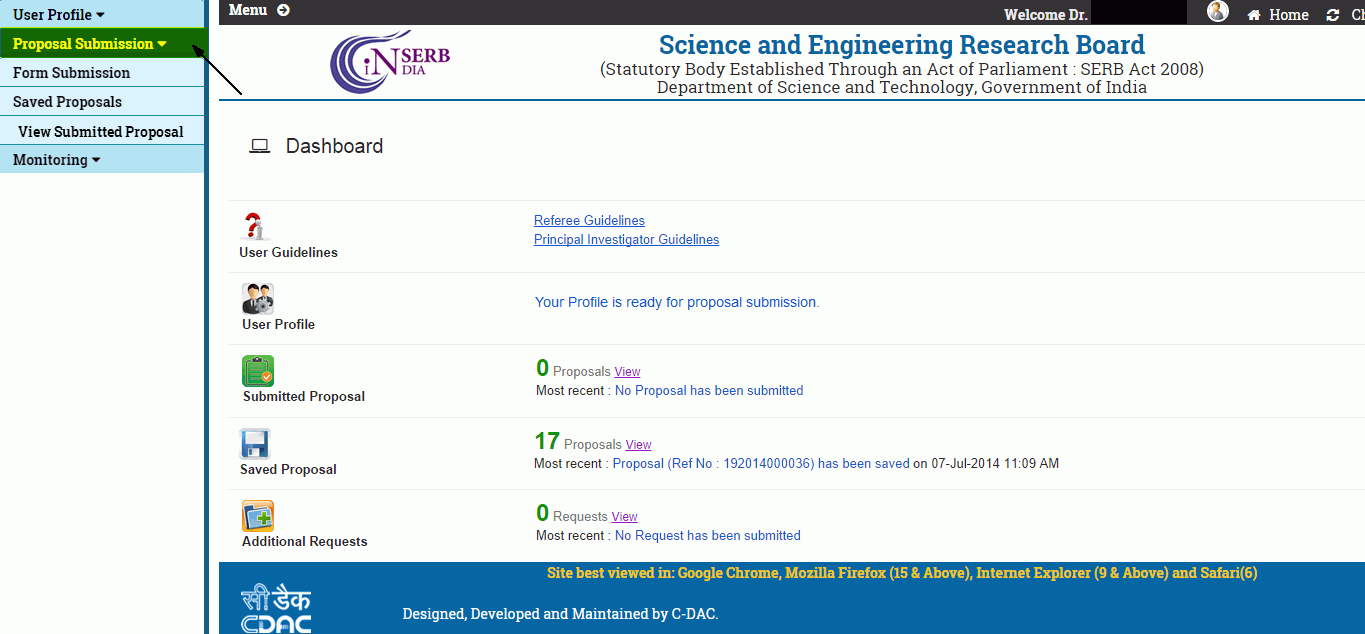
Figure 3.1
Note: It is mandatory to fill in the "Mandatory Information " form in "User Profile" menu before filling "Form Submission" section of "Proposal Submission". If your profile is filled the dashboard will display that "your profile is ready for proposal submission".
Form Submission :
Different details of proposal are to be filled in the format presented. Click on the Form Submission submenu (highlighted),as shown in Figure 3.2.
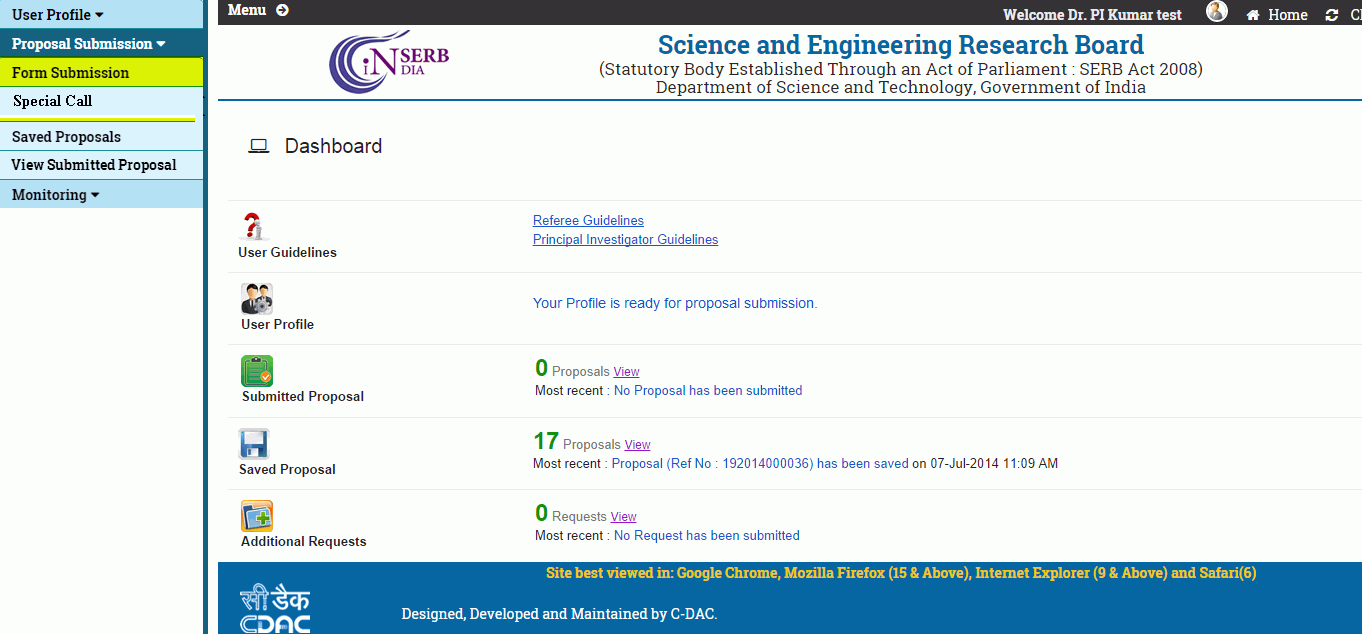
Figure 3.2
After selecting the submenu Form Submission from the menu, the form will appear, as shown in Figure 3.3. Select the scheme under which you want to submit the proposal.
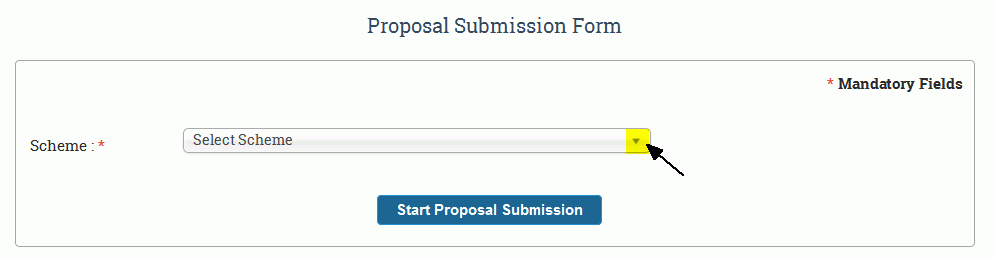
Figure 3.3
On selecting the required scheme, the page will appear as shown in Figure 3.4. Click on the button Start Proposal Submission" to go to Proposal Submission Form.
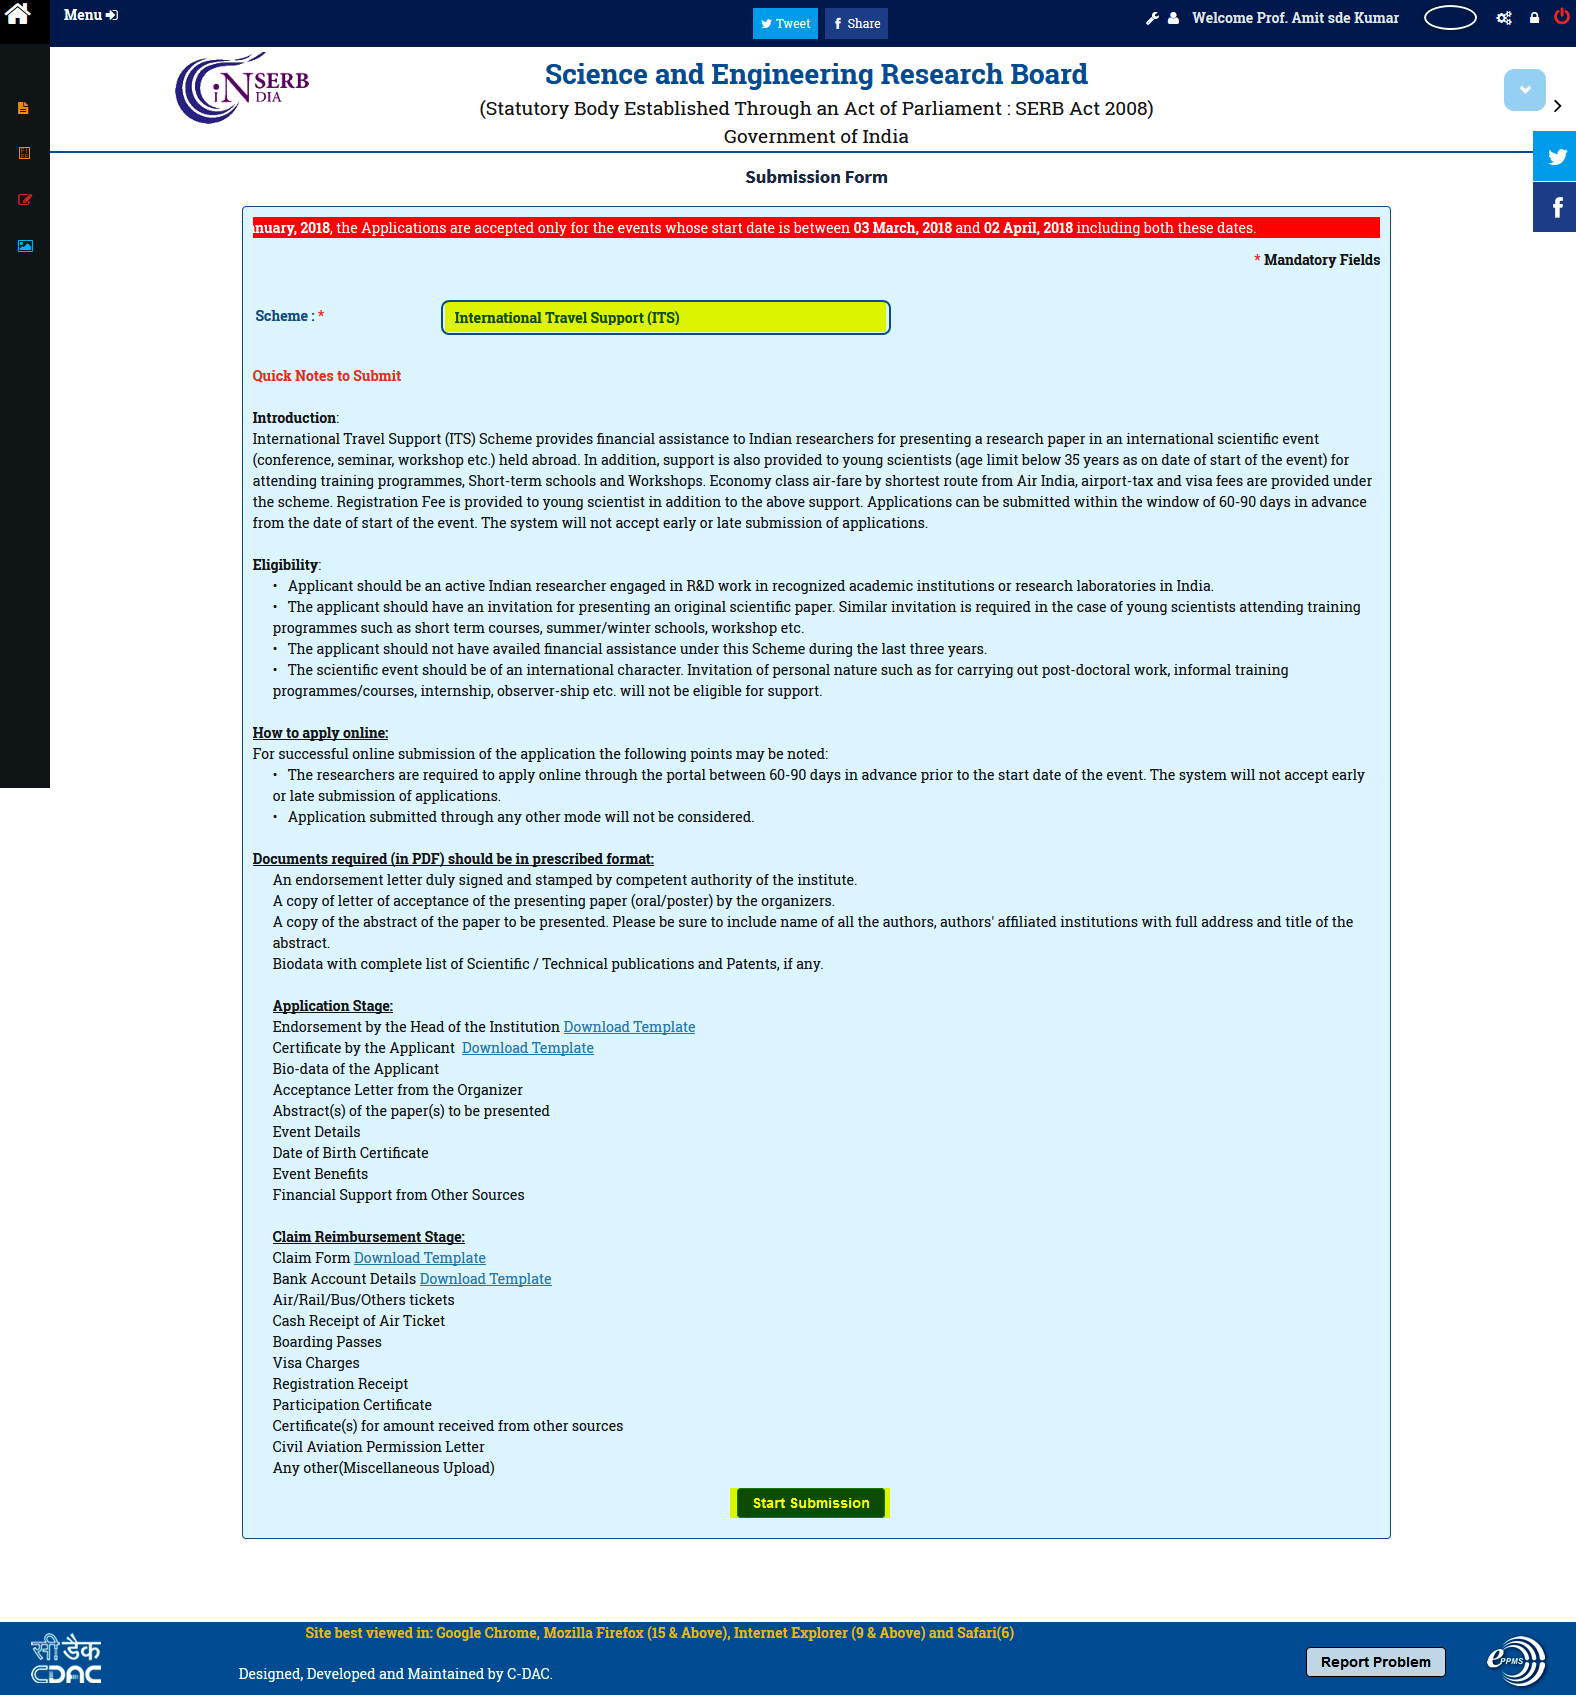
Figure 3.4
After clicking the START SUBMISSION button, the application form : Profile Details (as shown in Figure: 3.5).

Figure 3.5
The fields in Figure 3.5 are defined as follows:
-
Save& Next : After filling all the details click on this to save the proposal as draft and navigate to the next page : Event Details (as shown in Figure 3.6) ..
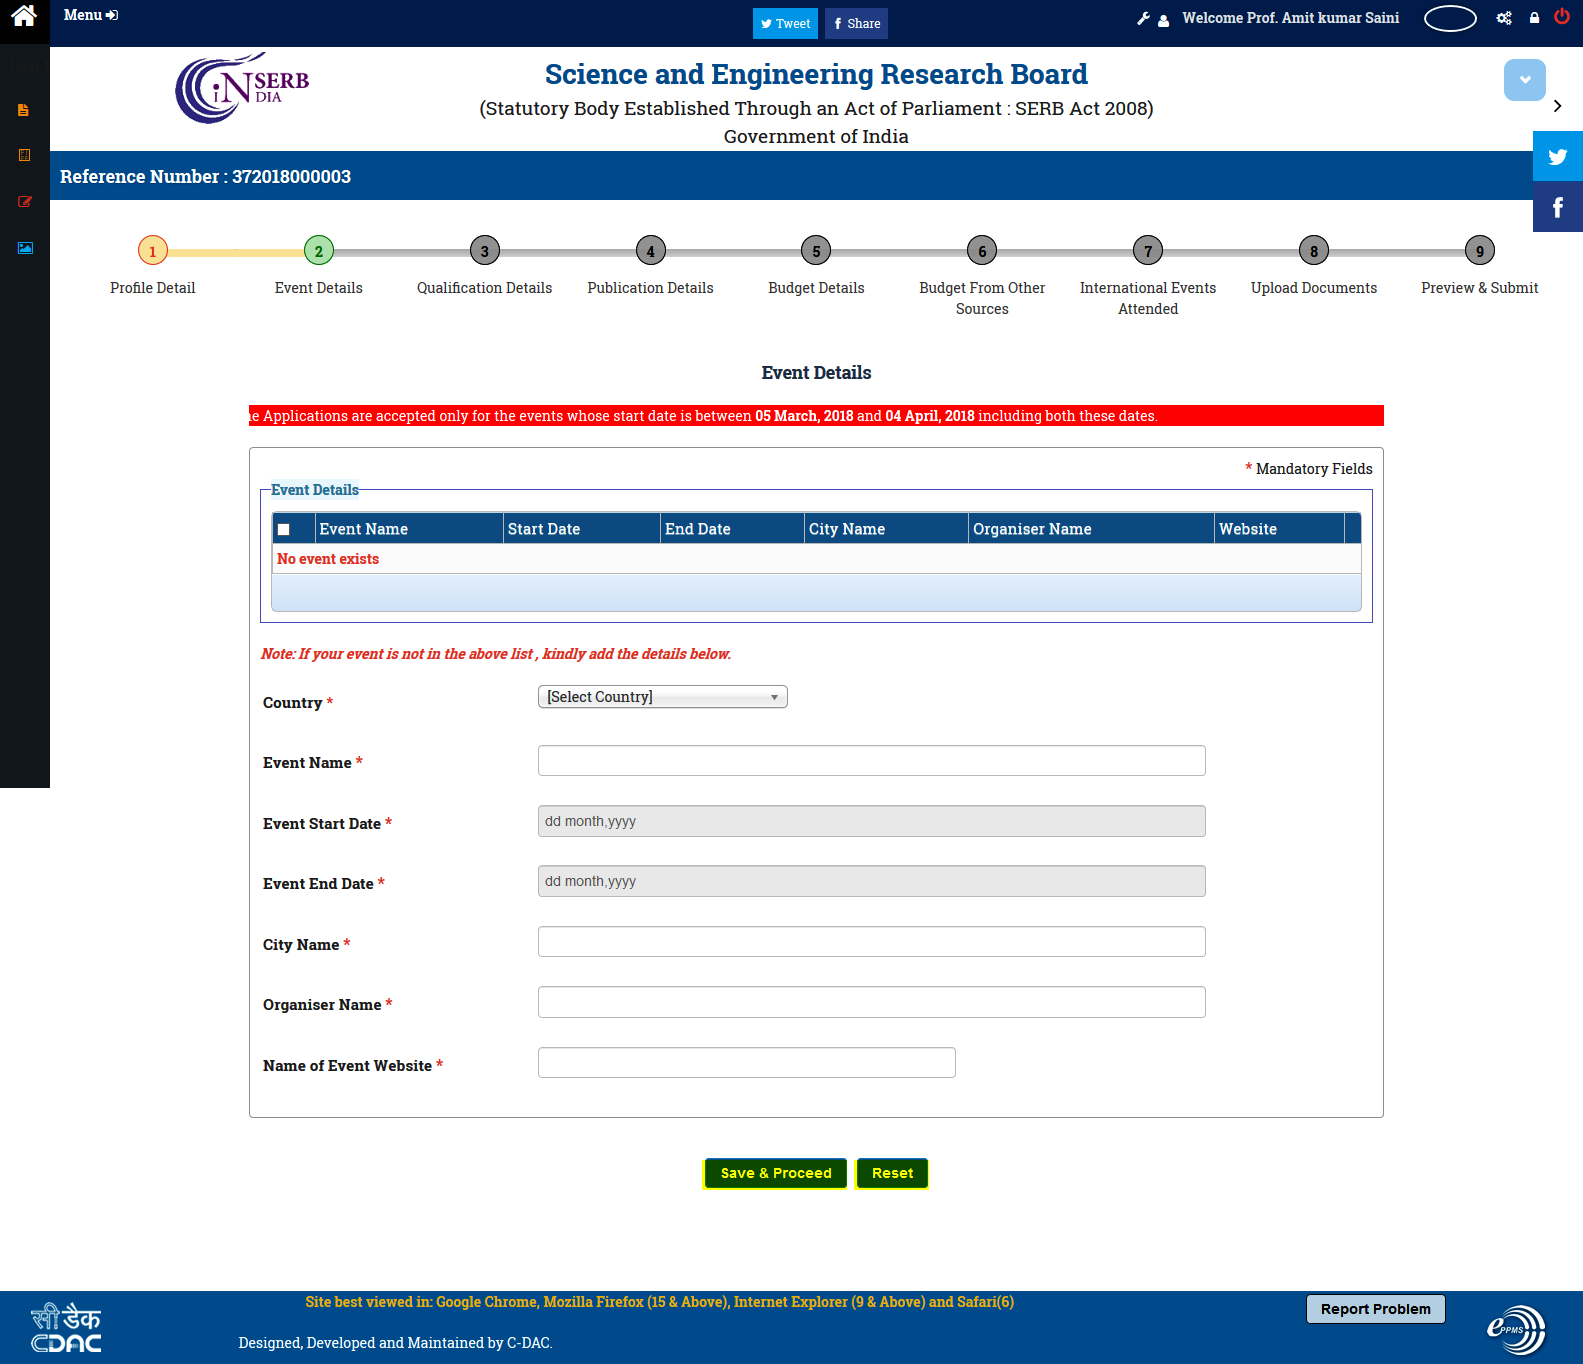
Figure 3.6 (a)
The fields in Figure 3.6 are defined as follows:
-
Save & Proceed : After filling all the details click on this to save the proposal as draft & proceed to the next page : Qualification Details (as shown in Figure 3.8 below).
-
Reset : This button is used to reset the whole form to blank.
The table in the form shows the event occurring in the country when you select the country as shown in Figure 3.6 (b).
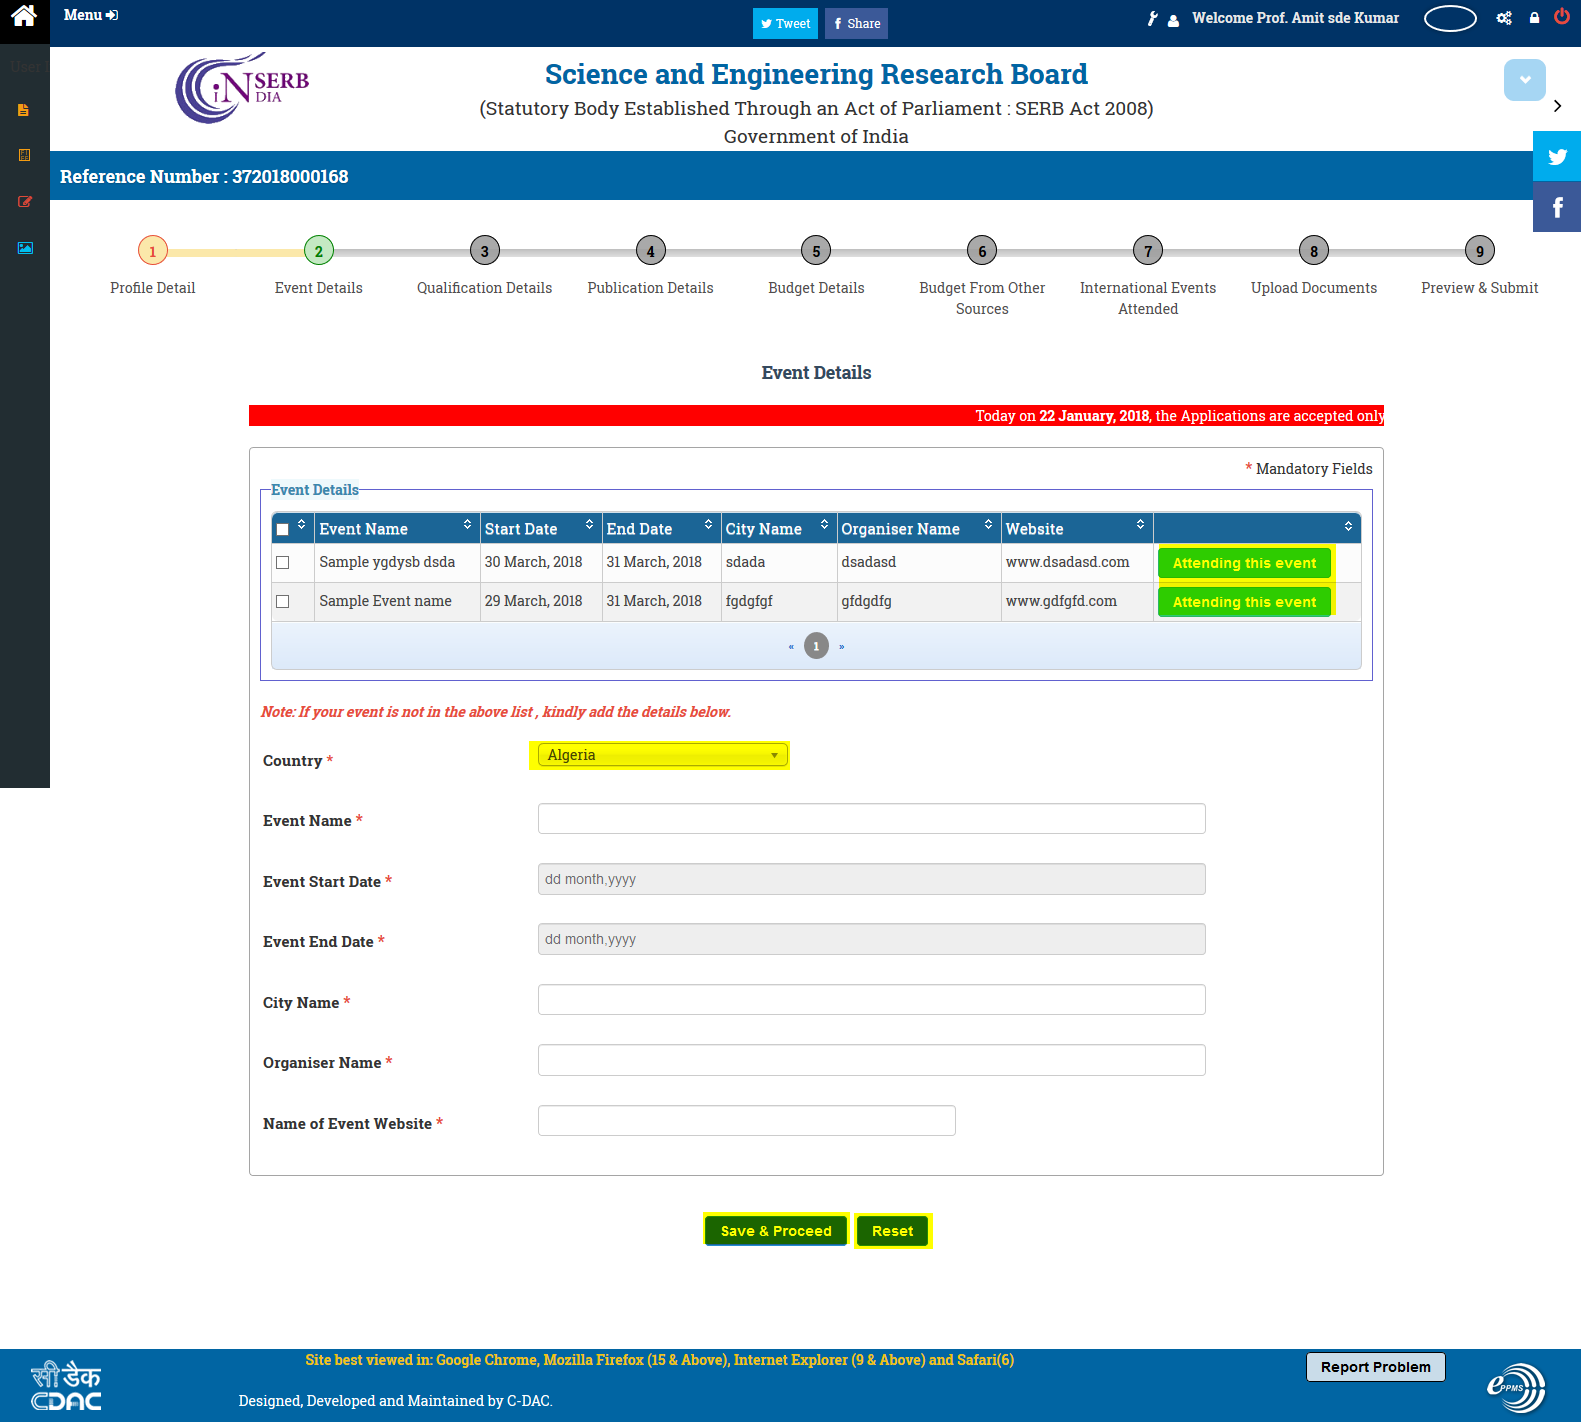 Figure 3.6
(b)
Figure 3.6
(b)
-
Attending this event : on clicking this button you can choose the event occurring in the country.
If there is no event then fill the details in the form and add the event .
When you Proceed to the next f form will appear,as shown in Figure 3.7.
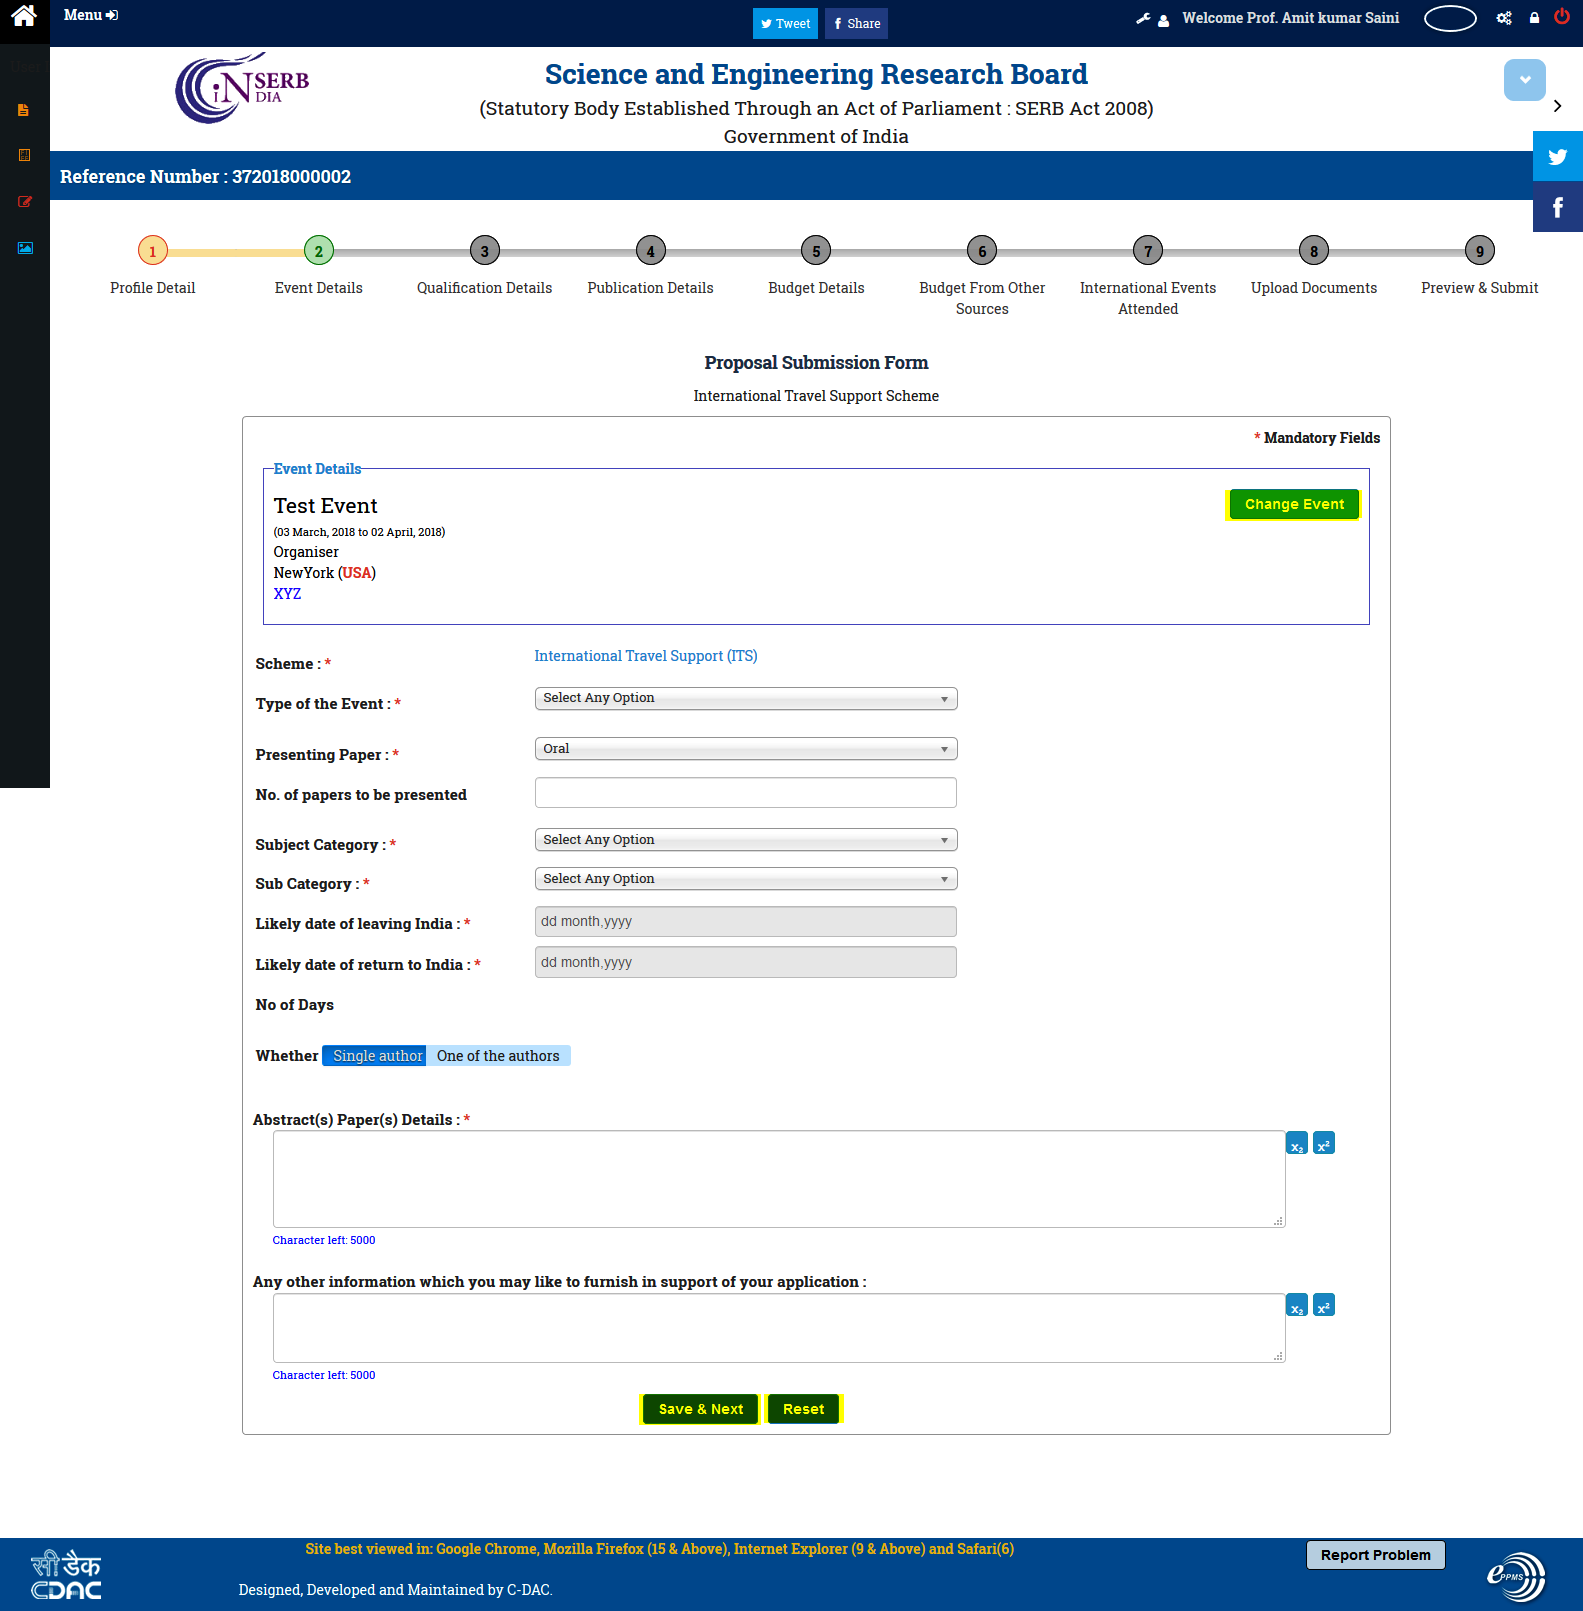
Figure 3.7
The Buttons in Figure 3.7 are defined as follows:
-
Save & Next : After filling all the details click on this to save the proposal as draft & proceed to the next page.
-
Reset : This button is used to reset the whole form to blank.
-
Change event: On click of this button you can change the details of the event .
When you click on the Next button ,Form will appear,as shown in Figure 3.8.
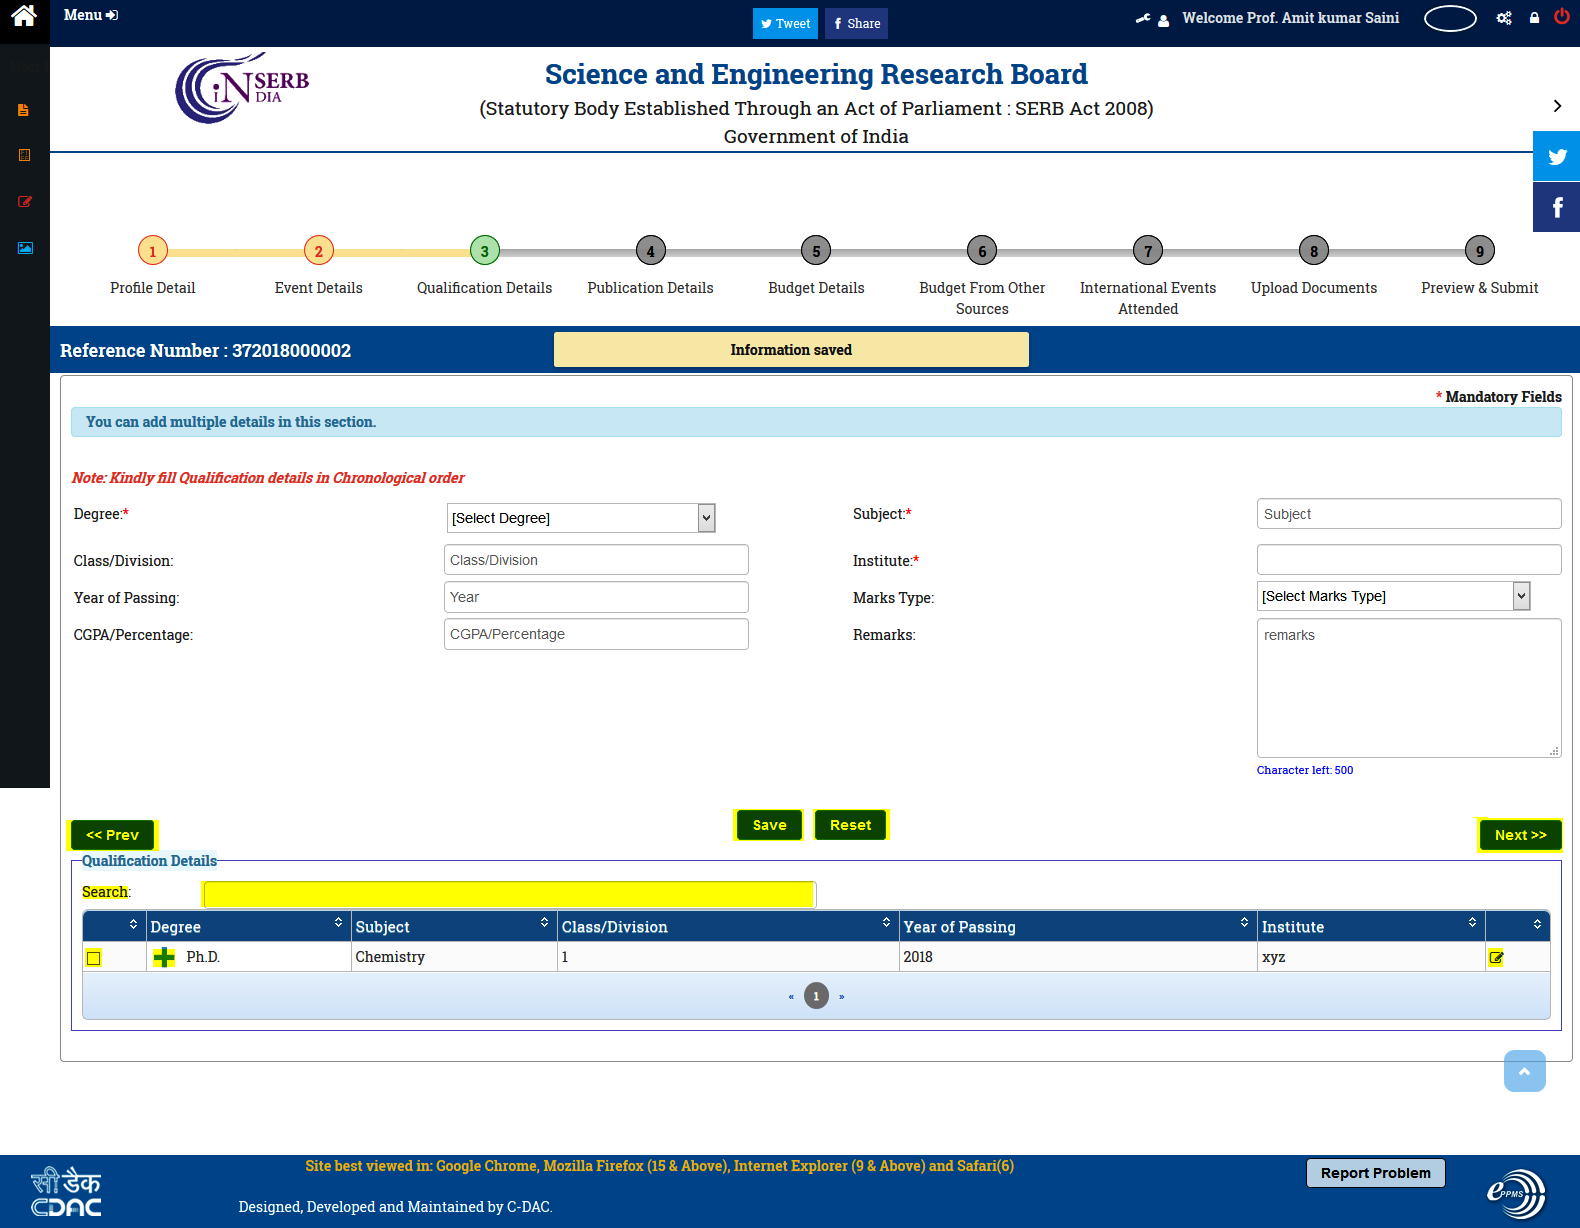
Figure 3.8
Figure 3.8shows the different functions/operation provided. They are:
-
Prev : This button will take you to previous form.
-
Reset : This button resets all the fields of the form to default value.
-
Next : This is used to navigate to next page after filling in all the details in the form.
-
Check box : This checkbox is used to mark/select different entries which you want to delete.
-
Plus Sign : On click, this displays the details not displayed in the table.
-
Edit Button : This symbol is for editing the details which are already added to the table. As you click on edit button , all the details will appear in different fields. Edit them as required and then click on the Update button.
-
Save: After filling all the details click on this to save the proposal as draft.
The table shows the saved data of the proposal.
After clicking the Next button , the form will appear as shown in Figure:3.9,
-
Figure 3.9
-
Prev : This button will take you to previous form.
-
Reset : This button resets all the fields of the form to default value.
-
Next : This is used to navigate to next page after filing in all the details in the form.
-
Check box : This checkbox is used to mark/select different entries which you want to delete.
-
Plus Sign : On click, this displays the details not displayed in the table.
-
Edit Button : This symbol is for editing the details which are already added to the table. As you click on edit button , all the details will appear in different fields. Edit them as required and then click on the Update button.
-
Save: After filing all the details click on this to save the proposal as draft.
The table shows the saved data of the proposal.
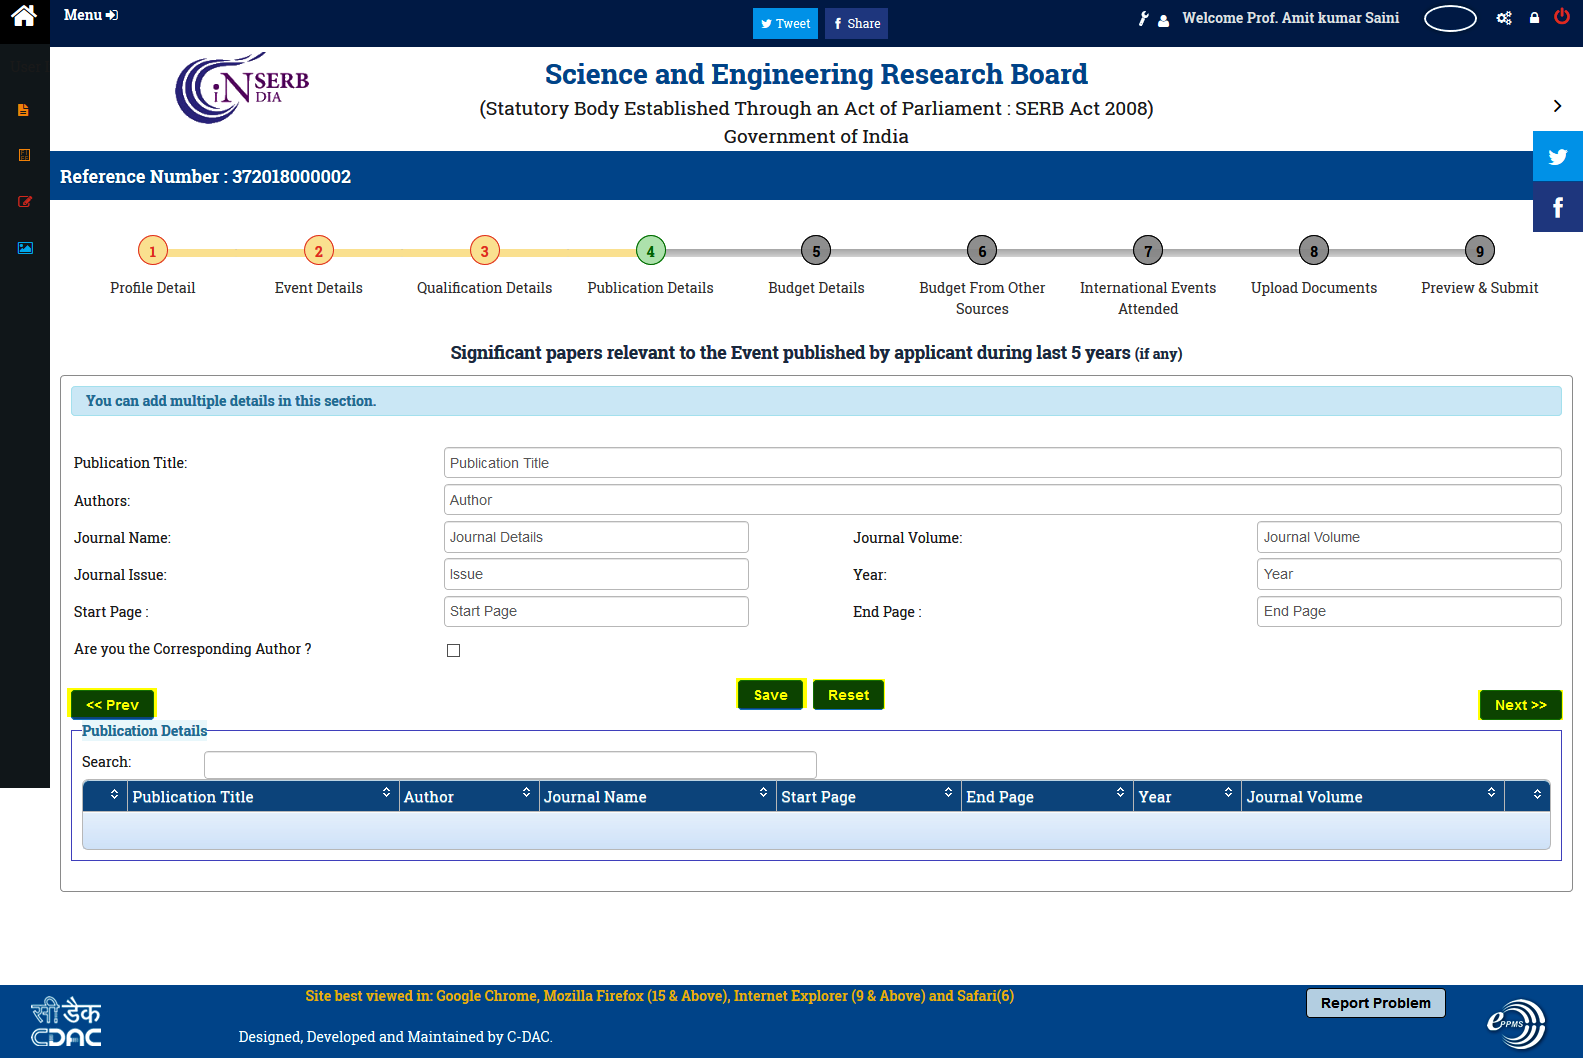
After clicking the Next button , the form will appear as shown in Figure:3.10,
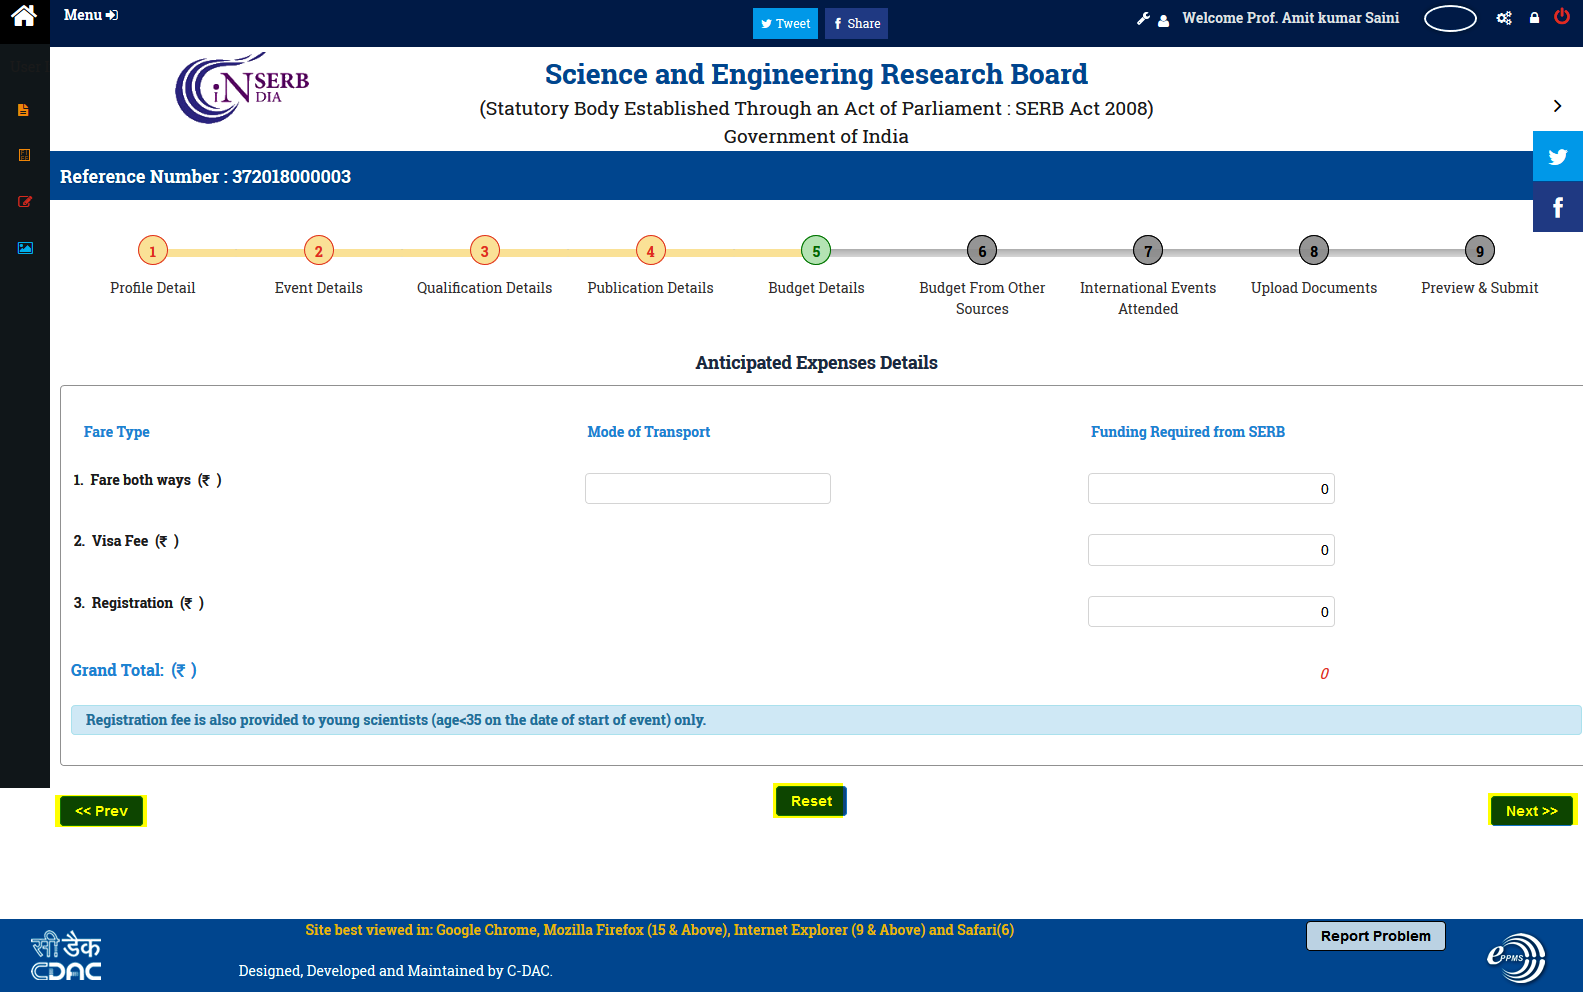
Figure 3.10
-
Prev : This button will take you to previous form.
-
Reset : This button resets all the fields of the form to default value.
-
Next : This is used to navigate to next page after filling in all the details in the form.
After clicking Next button, the form is shown as shown in Figure 3.11.
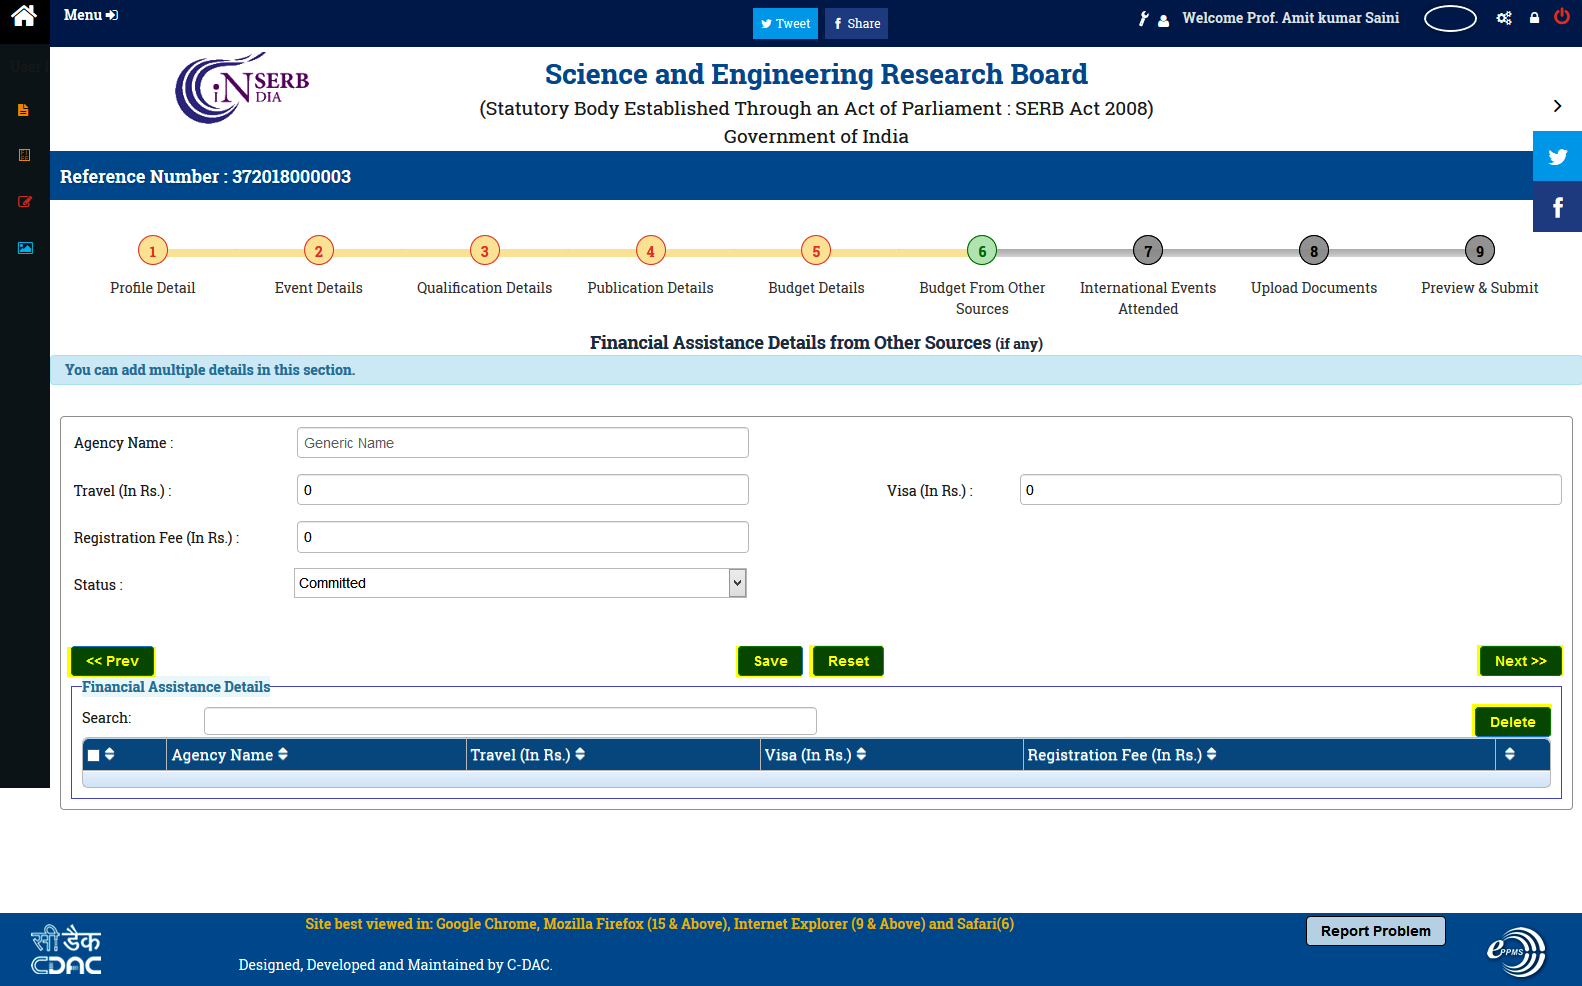
Figure 3.11
-
Prev : This button will take you to previous form.
-
Reset : This button resets all the fields of the form to default value.
-
Next : This is used to navigate to next page after filling in all the details in the form.
-
Check box : This checkbox is used to mark/select different entries which you want to delete.
-
Plus Sign : On click, this displays the details not displayed in the table.
-
Edit Button : This symbol is for editing the details which are already added to the table. As you click on edit button , all the details will appear in different fields. Edit them as required and then click on the Update button.
-
Save: After filing all the details click on this to save the proposal as draft.
-
Delete: On click of this button you can delete the save data from the table .
The table shows the saved data of the proposal.
When you click on the Next button the form will appear,as shown in Figure 3.12.
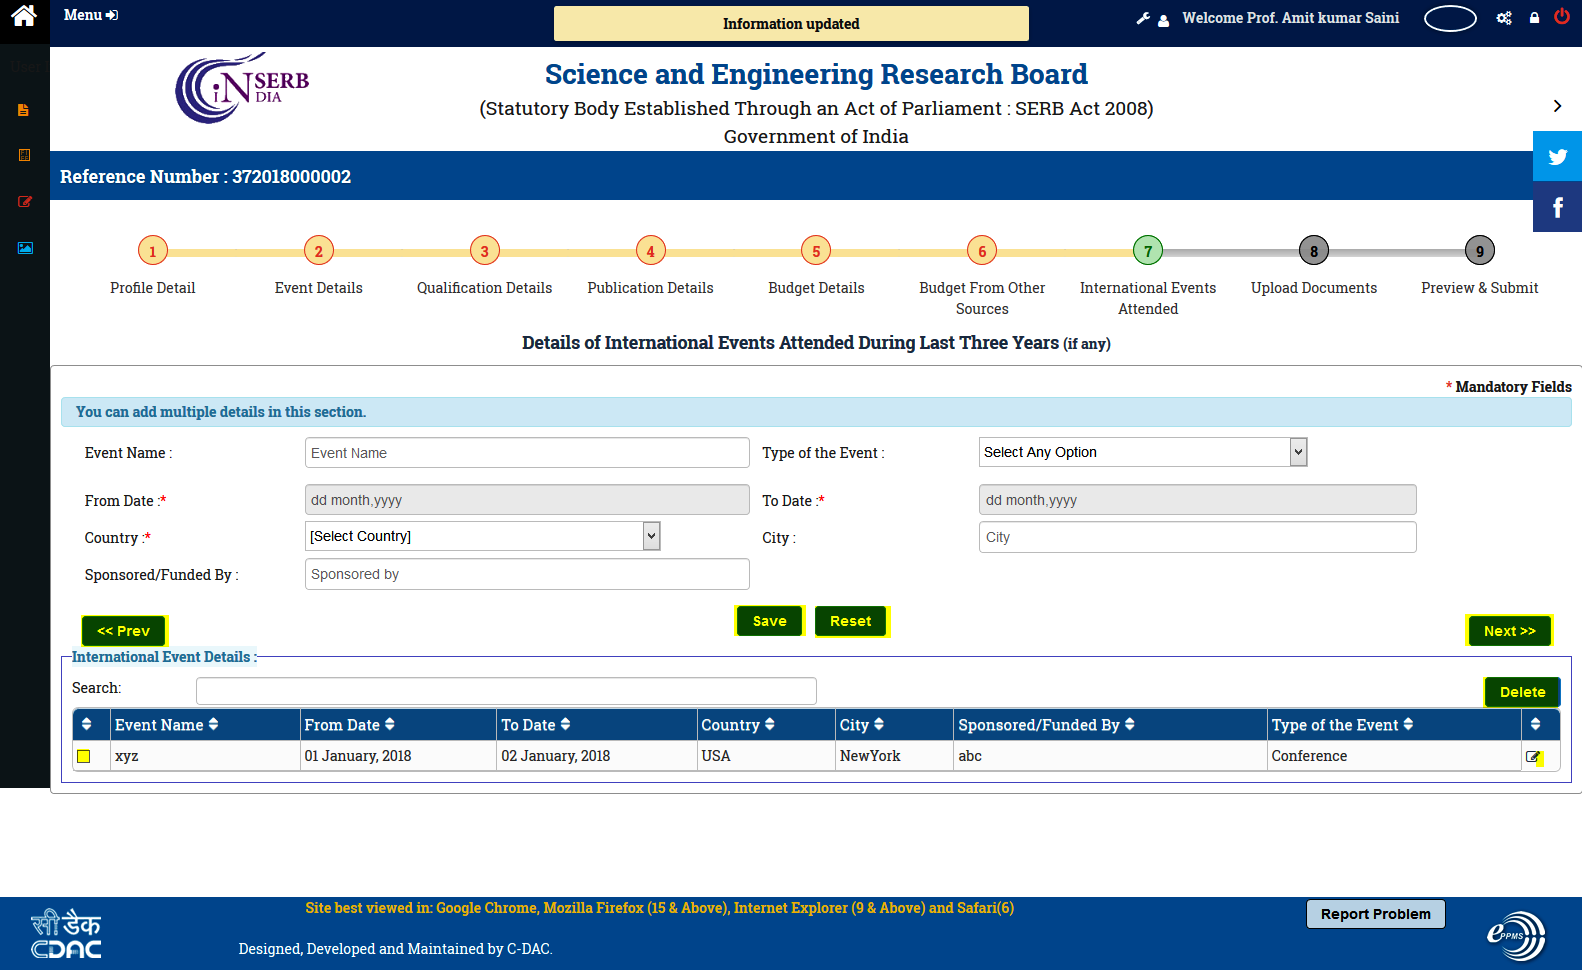
Figure 3.12
-
Prev : This button will take you to previous form.
-
Reset : This button resets all the fields of the form to default value.
-
Next : This is used to navigate to next page after filling in all the details in the form.
-
Check box : This checkbox is used to mark/select different entries which you want to delete.
-
Plus Sign : On click, this displays the details not displayed in the table.
-
Edit Button : This symbol is for editing the details which are already added to the table. As you click on edit button , all the details will appear in different fields. Edit them as required and then click on the Update button.
-
Save: After filling all the details click on this to save the proposal as draft.
-
Delete: On click of this button you can delete the save data from the table .
The table shows the saved data of the proposal.
When you click on the Next button the form will appear,as shown in Figure 3.13.
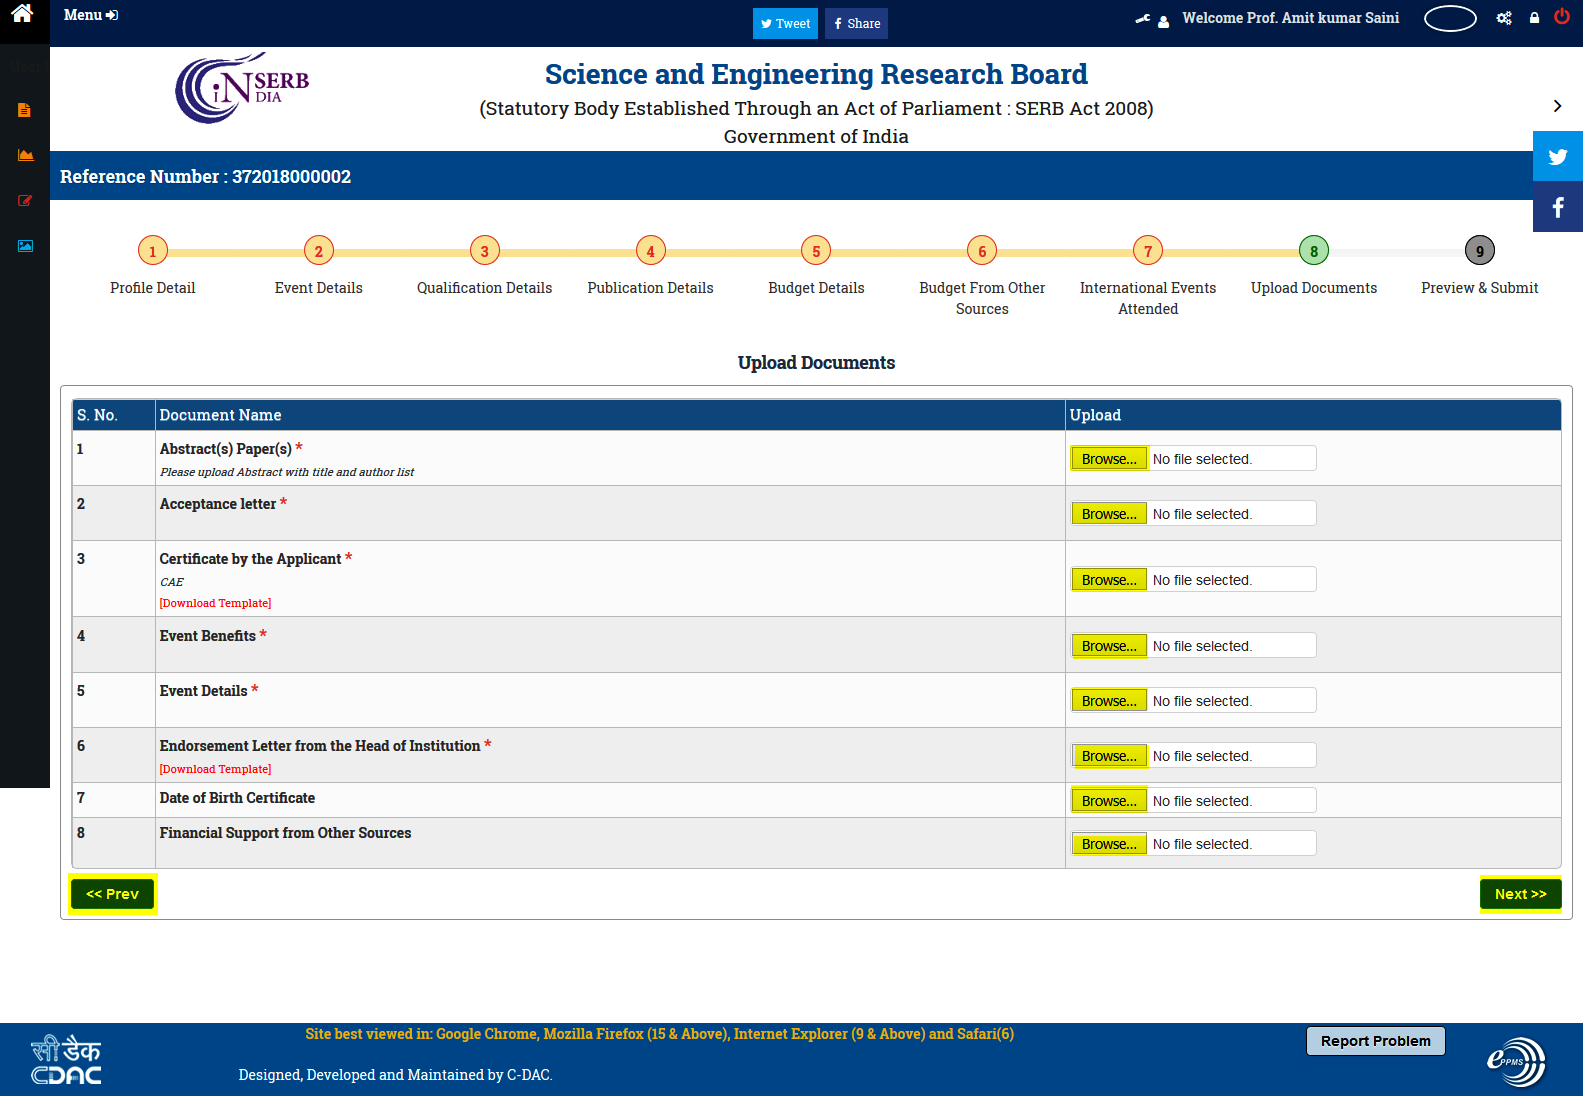
Figure 3.13
-
Prev : This button will take you to previous form.
-
Next : This is used to navigate to next page after filling in all the details in the form.
-
Browse: On click of this button you can upload the required documents.
When you click on the Next button the form will appear,as shown in Figure 3.14.
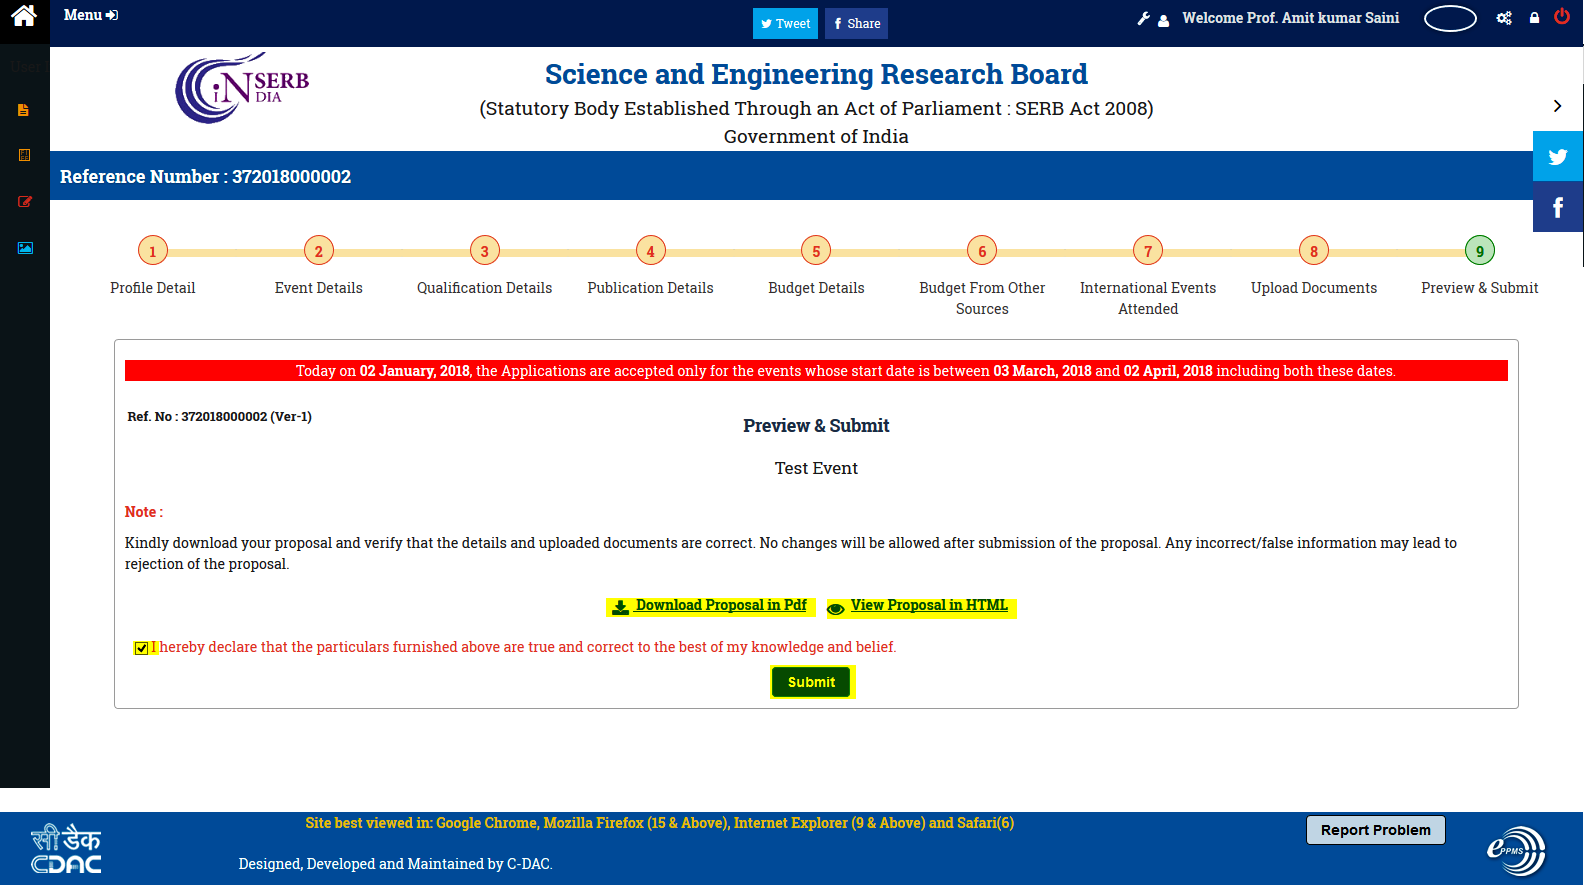
Figure 3.14
1. Download Proposal in pdf: On click of this button you can download the proposal in pdf format.
2.View proposal in html: On click of this button you can view the proposal in html format.
After checking the check box( highlighted) click on the Submit button to submit the form. After clicking the submit button the form is shown as in Figure:3.15,
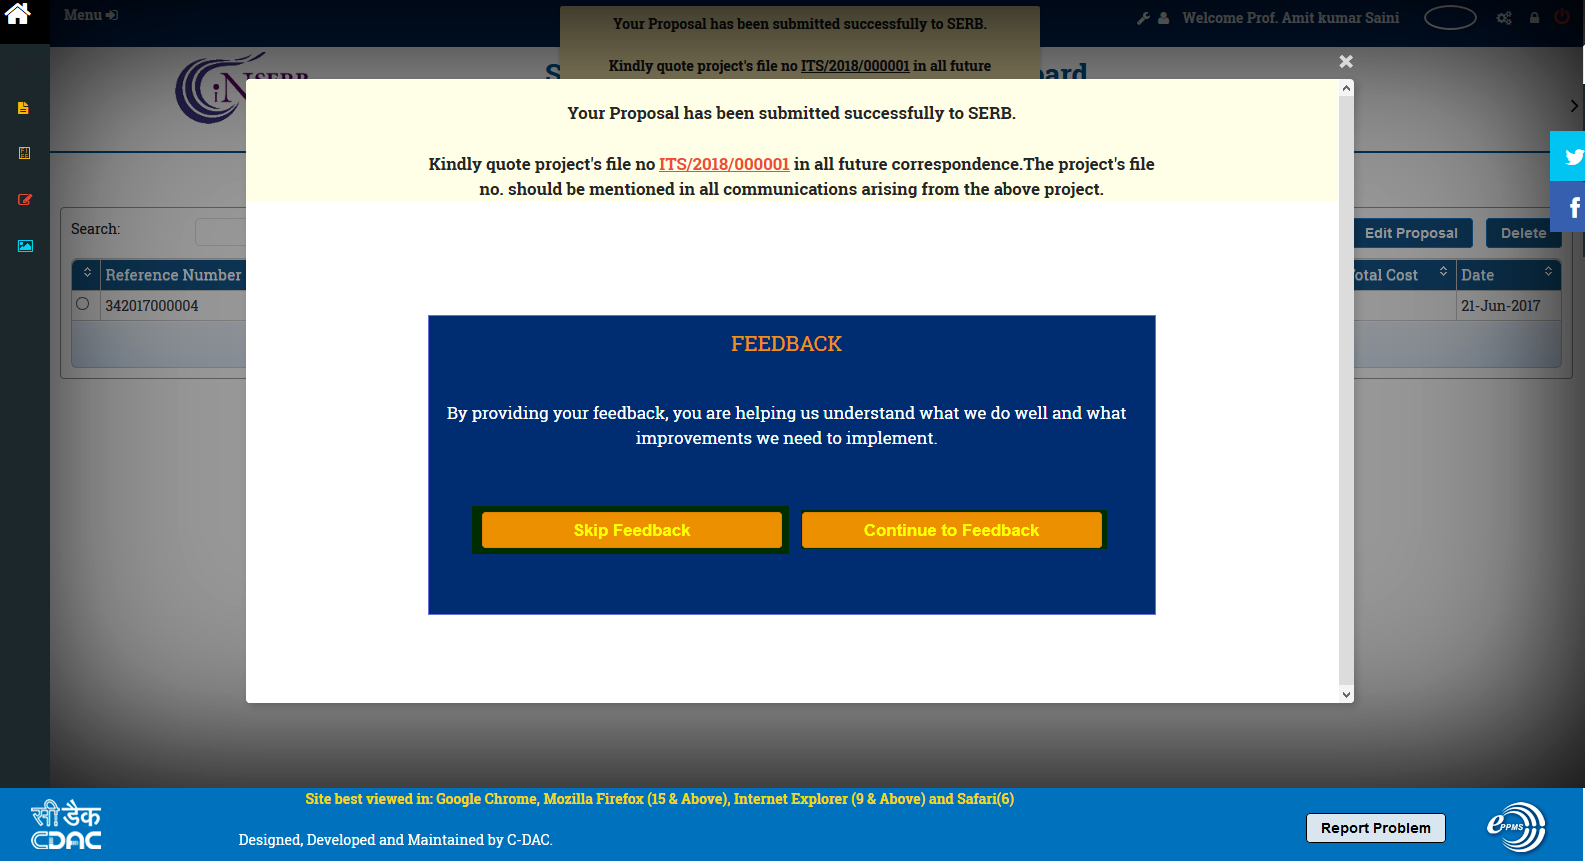
Figure 3.15.
The popup will be shown showing two buttons :
1. Skip Feedback: Click on this button to skip the feedback.
2. Continue feedback: Click on this button for feed back.
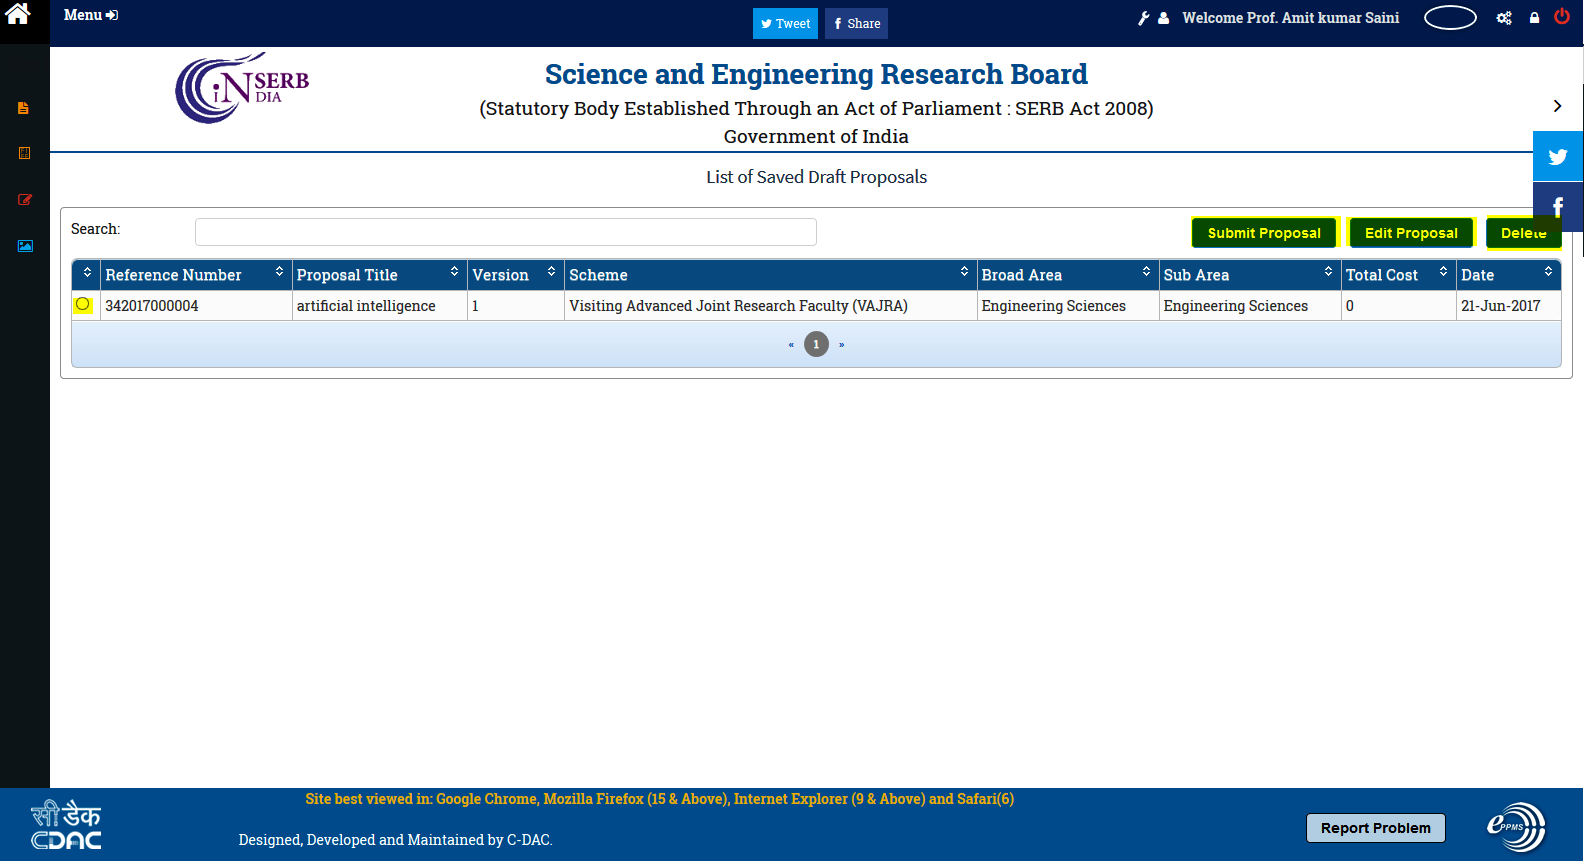
Figure 3.16
On this form there are 3 buttons:
1. submit proposal: On click of this button you can submit the proposal.
2. Edit proposal: On click of this button you can edit the proposal as required before submitting.
3. Delete: On click of this button you can delete the proposal in the draft stage.